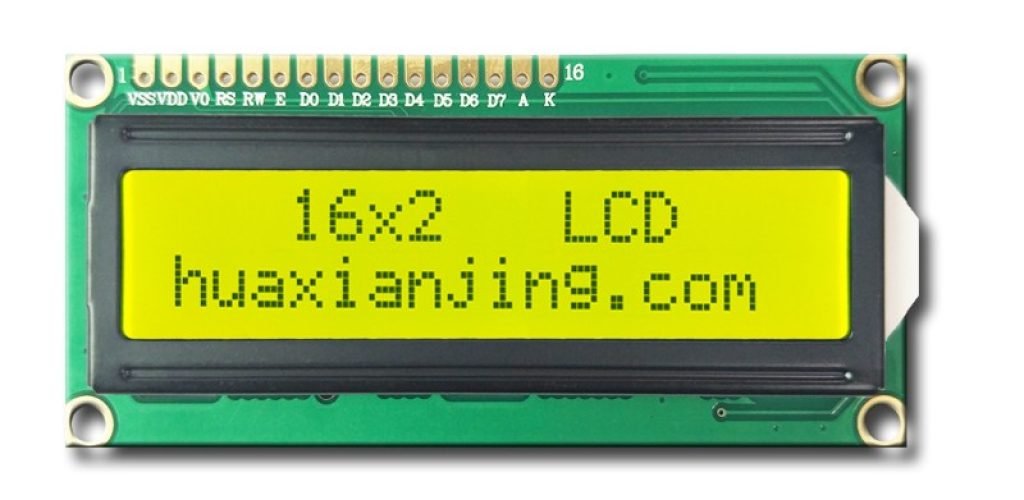
You can create custom characters on an LCD module by designing a pixel pattern on a 5×8 grid. This pattern turns into a byte array for the LCD to read.
Next, you store the pattern in the LCD’s Character Generator RAM using a function like lcd.createChar. This step saves your design so the LCD can use it.
Then, you display the character on the screen with a command like lcd.write(0). This brings your custom design to life.
Each step has challenges, like fitting your design in limited memory. This guide explains how to handle those issues and make your display stand out.
Since 2011, HUA XIAN JING has been focusing on the design and production of small and medium-sized LCDs. We provide our customers with COB/COG monochrome LCD module customization, 0.42″-10.11″ TFT LCD customization and enhanced LCD module customization services. So far, we have customized 10,000+ LCD modules for our customers, contact us for more professional services about LCD modules.
How Can You Define a Custom Character for an LCD Display?
You can define a custom character for an LCD display by designing a pixel pattern and encoding it into bytes for the display to recognize. This process lets you create unique symbols or shapes like a heart or arrow on a 16×2 LCD.
Crafting a custom character starts with understanding the display’s grid limits, often a 5×8 pixel grid, where you decide which pixels to turn on or off. This step is key to making sure your design fits the LCD character set and looks right when displayed.
- Most LCD display character sets use a 5×8 grid (5 columns, 8 rows), though some use a 5×7 grid for smaller designs. Each pixel in this grid is either on (1) or off (0), forming the shape you want.
- Design Process: Sketch your idea first, like a smiley face, using tools such as custom character generators or simple graph paper to plot each pixel. This helps avoid errors before coding.
- Pixel Mapping: Each row of the grid turns into a byte, with the least significant 5 bits representing the pixels (e.g., a row of 01010 becomes decimal 10).
- Example Data: For a heart shape, you might use a byte array like [0b00000, 0b01010, 0b11111, 0b11111, 0b01110, 0b00100, 0b00000, 0b00000]. Each value defines one row of the custom character sculpture on the screen.
How Do You Encode a Custom Character into Bytes?
Encoding a custom character into bytes means converting each row of your pixel design into a binary value that the LCD display custom characters Arduino setup can read.
This step turns your visual idea into data by assigning binary numbers to each row of the 5×8 grid. Double-check each byte to avoid misaligned pixels, as even one wrong bit can distort the liquid crystal display symbol.
- Byte Conversion: Take each row of your design and note the pixel states (1 for on, 0 for off) to form a 5-bit binary number, padded with zeros to make an 8-bit byte (e.g., row 01110 is binary 01110, or decimal 14).
- Verification Tip: Always match the binary data against your sketch to ensure the LCD character code reflects the intended shape. Tools like spreadsheets can help convert binary to decimal if you’re doing it by hand.
- Common Error: New users often mix up bit positions, so visually confirm each row’s value before uploading to an Arduino LCD create char program.
Storing Characters in CGRAM
Storing custom characters in CGRAM (Character Generator RAM) is a key feature of LCD displays, allowing you to design and display personalized symbols. Below, I’ll break down the essentials of CGRAM, how to use library functions to store characters, and the differences between libraries you might encounter.
Understanding CGRAM Basics
CGRAM is a small memory space in an LCD controller designed to hold custom characters. Here’s what you need to know:
- Capacity: CGRAM can store up to 8 custom characters. Each character is assigned to one of 8 slots, numbered 0 to 7.
- Memory Addresses: These slots correspond to addresses 0x40–0x7F in the controller’s memory. For example, slot 0 starts at 0x40, slot 1 at 0x48, and so on, with each character occupying 8 bytes.
- Why 0x40?: The address 0x40 is the standard base address designated by most LCD controllers (like the HD44780) for custom characters. This ensures compatibility across many LCD modules.
Each custom character is defined as a 5×8 pixel grid, represented by an 8-byte array where each byte defines one row of the character.
Using Library Functions
To store a custom character in CGRAM, you’ll typically use a library function like lcd.createChar(). Here’s how it works:
- Function Syntax:
lcd.createChar(location, byteArray)- location: A number from 0 to 7, indicating the slot where the character will be stored.
- byteArray: An 8-byte array defining the character’s pixel pattern.
- Example:
byte heart[8] = {
  B00000,
  B01010,
  B11111,
  B11111,
  B01110,
  B00100,
  B00000,
  B00000
};
lcd.createChar(0, heart); // Stores the heart in slot 0
This code defines a heart shape and saves it in slot 0.
- Variations: Some libraries might reverse the parameter order (e.g.,
lcd.createChar(byteArray, location)) or require additional setup. Always check your library’s documentation to confirm.
Before using this function, ensure your LCD is initialized (e.g., with lcd.begin(16, 2) for a 16×2 display).
Library Differences
The process of storing characters can vary depending on the library and hardware setup. Here are the key distinctions:
- Standard Library vs. I2C Variants:
- Standard: Requires direct pin connections to the Arduino or microcontroller. You’ll need to specify pins during initialization (e.g.,
LiquidCrystal lcd(12, 11, 5, 4, 3, 2)). - I2C: Uses an I2C backpack, reducing wiring. Initialization requires the I2C address (e.g.,
LiquidCrystal_I2C lcd(0x27, 16, 2)).
- Standard: Requires direct pin connections to the Arduino or microcontroller. You’ll need to specify pins during initialization (e.g.,
- Compatibility Fix: Mismatched libraries and hardware can lead to CGRAM write failures. For example, using a standard library with an I2C LCD won’t work. Double-check your setup and library version.
- Initialization: Always call the library’s begin function (e.g.,
lcd.begin()) before storing characters. Skipping this step can prevent CGRAM from being accessed properly.
How to Display Custom Characters on an LCD?
You display custom characters on an LCD by using the lcd.write function with the CGRAM slot index, like lcd.write(0) for a heart symbol. Position the cursor with lcd.setCursor to place the character precisely.
To ensure clear displays, preview your character placement in code comments. This helps track where each custom character lands on the 16×2 LCD, avoiding overlaps. Also, test with one character first to confirm the LCD character set renders correctly before mixing with text.
- Writing to the LCD:
- Use
lcd.write(location)where location (0–7) is the CGRAM slot, not an ASCII code. - Example:
lcd.write(0)shows the character stored in slot 0, like a heart emoji. - Alternative: Some libraries use
lcd.print(char(location)), but check compatibility for your LCD display.
- Use
- Cursor Positioning:
- Call
lcd.setCursor(col, row)before writing. For example,lcd.setCursor(5, 1)targets column 5, row 1 on a 16×2 LCD. - Mid-string tip: Reset the cursor explicitly (e.g.,
lcd.setCursor(8, 0)) to avoid overwriting existing text.
- Call
- Combining with Text:
- Mix custom characters with text by alternating
lcd.printandlcd.write. - Example:
lcd.setCursor(0, 0); lcd.print("Love "); lcd.write(0); // Displays heart symbol - Ensure LCD character display modules are initialized with
lcd.begin(16, 2)to support text and symbols.
- Mix custom characters with text by alternating
Why Does My Custom Character Show Incorrectly?
Incorrect displays often stem from wrong CGRAM slot usage or uninitialized LCDs. Always initialize with lcd.begin(16, 2) and verify the location in lcd.write matches the slot used in lcd.createChar.
To prevent errors, double-check slot numbers in your Arduino LCD create char code, as slots 0–7 are the only valid options. Also, clear the display with lcd.clear() before testing new characters to avoid ghosting from prior outputs.
- Slot Verification: If
lcd.createChar(1, heart)is used, write withlcd.write(1), notlcd.write(0). - Initialization: Run
lcd.begin(16, 2)for a 16×2 LCD to enable the LCD character set. - Clear Display: Use
lcd.clear()to reset the screen, ensuring no old data interferes with your custom lcd design.
Overcoming Common Challenges
When working with custom characters on LCD displays, you may face several common hurdles, including the eight-character limit, debugging errors, and library compatibility issues. Below, I’ll break down these challenges and offer clear, actionable solutions to help you troubleshoot and succeed.
The Eight-Character Limit
LCD displays typically restrict you to 8 custom characters because of the limited space in the CGRAM (Character Generator RAM). Here’s how to navigate this limitation:
- Reuse Slots: Assign your most-used characters to slots 0–7 and reference them multiple times across your display. This maximizes the use of available space.
- Dynamic Overwriting: Update the CGRAM during your program to load new characters as needed. For instance, you can overwrite a slot to introduce a new character when the display requires it.
- Example: For a basic animation, store frame 1 in slot 0 and display it. Then, overwrite slot 0 with frame 2 and display it again. By cycling through updates like this, you can create the illusion of more than 8 characters without exceeding the limit.
Using these techniques, you can effectively stretch the eight-character cap to meet your project’s needs.
Debugging Errors
Errors with custom characters often show up as garbled displays or blank spots. Here’s how to pinpoint and fix these issues:
- Garbled Characters:
- Cause: The byte array defining your character is misaligned.
- Fix: Carefully review your byte array to ensure each row’s pixels are encoded correctly. For example, a row with pixels “on, off, on” should be written as
0b10100, not0b01010. A single misplaced bit can distort the entire character.
- Nothing Displays:
- Cause: The character location is wrong, or the LCD library isn’t initialized properly.
- Fix: Confirm that the location in
lcd.write(location)is between 0 and 7 (valid CGRAM slots). Also, verify initialization—for a 16×2 display, uselcd.begin(16, 2)to set up the LCD correctly.
- Tip: Test your setup with a simple pattern, like a square (
0b11111, 0b10001, 0b10001, 0b11111) or a cross. If the test pattern shows up, your CGRAM is working, and the problem likely lies in your custom character’s data.
These steps will help you quickly diagnose and correct display problems.
Library Compatibility Issues
Different LCD libraries can introduce quirks, especially when functions behave inconsistently across setups. Here’s how to tackle compatibility challenges:
- Problem: Commands like
lcd.createChar()orl cd.begin()might fail or work differently depending on the library (e.g., standard vs. I2C). - Solution: Match your library to your hardware. For example:
- Standard Library: Works with direct pin connections and requires specific pin assignments during setup.
- I2C Library: Uses an I2C interface and needs the correct address, like
LiquidCrystal_I2C lcd(0x27, 16, 2).
- Example: With an I2C LCD, initialize it with the proper address and call
lcd.begin()accordingly. A standard library setup, on the other hand, won’t need an address but will require pin definitions. Check your hardware documentation to confirm the right approach.
Animating Custom Characters
To animate custom characters, update the Character Generator RAM (CGRAM) slots in a loop. This technique lets you create dynamic visuals like moving icons or progress bars.
- Basic Animation Example:
Define frames as byte arrays and update the CGRAM slot with delays for timing:byte frame1[8] = {0x04, 0x0E, 0x15, 0x04, 0x04, 0x04, 0x04, 0x04};
// Example: Stick figure
byte frame2[8] ={0x04, 0x0E, 0x15, 0x04, 0x04, 0x0A, 0x15, 0x00};
// Stick figure moving
lcd.createChar(0, frame1); delay(500);
lcd.createChar(0, frame2); - Smooth Transitions: Sync multiple slots (e.g., slots 0-3) in sequence for complex animations like a progress bar. Update one slot at a time with controlled delays (e.g., 200ms).
Tip: Test timing on your hardware—emulators may not match real LCD behavior.
Extending Beyond Eight Slots
Most LCDs limit you to eight custom characters, but you can extend this:
- External Memory: Use shift registers or external memory to queue additional patterns, feeding them into CGRAM as needed.
- Advanced Controllers: Some LCD controllers support larger CGRAM or character banking, allowing dozens of custom characters without extra hardware.
Caution: Thoroughly test external setups to prevent data corruption.
Graphical LCD Integration
Graphical LCDs offer more flexibility than character-based ones by using pixel buffers instead of CGRAM.
- Key Difference: Draw custom designs pixel-by-pixel, not limited to 5×8 grids.
- Hybrid Displays: On supported models, mix character regions (for text) with graphic regions (for icons or LCD emoji).
This approach suits complex visuals beyond standard character limitations.
Multilingual and Large-Font Support
Enhance displays with diverse fonts:
- Non-Latin Scripts: Design characters within the 5×8 grid for simple scripts, or split complex glyphs (e.g., CJK) across multiple slots.
- Large Fonts: Combine adjacent slots (e.g., two 5×8 slots for a 10×16 font) and tweak spacing for readability.
Example: A 10×16 “A” might use slot 0 for the left half and slot 1 for the right, displayed side-by-side.
FAQ
Can I save custom characters permanently on the LCD module?
No, custom characters in CGRAM are stored only during runtime and are lost when the LCD powers off, requiring you to reload them each time the program starts.
Can I Save More Than 8 Custom Characters Without Overwriting Slots?
Yes, you can store extra designs in external memory or use shift registers to queue more than 8 custom characters for a 16×2 LCD. Swap them into CGRAM slots like slot 4 or slot 5 when needed.
Why Do My Custom Characters Flicker or Disappear During Display?
Flickering often happens if the LCD display custom characters Arduino setup refreshes too fast or loses power briefly. Check your wiring and add a small delay of 100ms after each lcd.write call to stabilize output.
How Do I Protect My Custom Characters from Being Lost on Power-Off?
CGRAM data resets on power loss, so save your custom character byte arrays in your Arduino custom character program code. Reload them using lcd.createChar on startup to restore designs to slots 0 to 7.
What Should I Do If My LCD Displays Random Symbols Instead of My Design?
Random symbols appear if the CGRAM slot like slot 1 is empty or the byte array for your liquid crystal display symbol is wrong. Verify your data matches the 5×8 pixel grid and test with a simple shape first.


