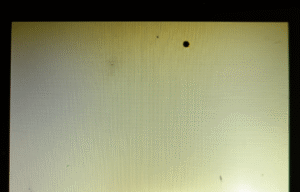
You can confirm LCD backlight protection against reverse polarity by applying a reverse voltage to the power inputs and observing the result. If the backlight stays off under reversed polarity and works fine with correct dc polarity, the protection is working.
Another sign of effective reverse polarity protection is if the backlight still lights up under dc reverse polarity, showing active correction by a smart IC. This test reveals whether a reverse polarity protection circuit like a diode or MOSFET is in place.
Testing needs the right tools and safe steps to avoid harming the LED backlight LCD. I’ll walk you through the methods to check polarity in electronics without risks.
You might face issues like unclear results or missing data about reverse polarity protection diode setups. This guide covers how to handle those problems with practical tips.
How Can You Test Backlight Behavior Under Reverse Polarity Conditions?

Testing backlight behavior under reverse polarity conditions is straightforward. You simulate reverse polarity using a controlled power supply and observe if the backlight functions or remains protected.
Let’s dive into a practical approach for testing. I’ve found that setting up a safe environment with a current-limited power supply prevents any accidental damage during the reverse polarity test. Also, documenting every step helps you compare results and spot issues fast.
Here’s a clear step-by-step guide to ensure accurate testing of reverse polarity protection:
- Preparation: Gather a DC power supply with a current limit of 50-100 mA, a multimeter, and test leads. Check the LCD backlight datasheet for pinout and voltage ratings like 3.3V or 5V.
- Baseline Test: Connect the power with correct polarity in electronics and confirm the backlight lights up. Measure voltage and current for a reference point, expecting around 20-50 mA for typical setups.
- Reverse Polarity Test: Swap the leads to apply dc reverse polarity for a short time, about 5-10 seconds. Watch for illumination—none means passive polarity protection like a diode; light means active correction.
- Post-Test Check: Return to correct polarity and verify the LED backlight LCD works as before. Compare readings to the baseline to detect any hidden damage.
- Measurement Notes: For passive protection, current leakage should be under 1 µA with a diode, or slightly more with a MOSFET. A voltage drop of 0.7V for standard diodes or 0.3V for Schottky diodes is normal in correct polarity, but it should be zero in reversed polarity.
What Should You Do If Reverse Polarity Protection Fails?
If reverse polarity protection fails, stop the test immediately and disconnect power to avoid further damage to the LCD system.
It’s critical to act fast if you notice odd behavior like dim lighting or no response after reversing polarity. This could mean the backlight polarity protection isn’t working, and you need to troubleshoot the circuit to prevent permanent issues.
- Check for Damage: Look at the backlight for signs of failure, like no light even with correct dc polarity. Measure current and voltage again—readings far from the baseline, such as current spiking over 100 mA, often indicate a problem.
- Circuit Review: Inspect for missing or faulty reverse polarity protection circuit components like diodes or MOSFETs. A burned-out diode might show a voltage drop of 0V in both polarities, signaling a short.
If you’re worried about repeated failures, consider adding a backup reverse polarity protection diode rated for the backlight’s current, ensuring it handles at least 50 mA continuously.
Understanding Protection Mechanisms

LCD backlights need protection from reverse polarity to avoid damage. Below are the main mechanisms, explained with how they work, technical details, and their pros and cons.
Series Diode Protection
This method is simple but wastes some power due to the voltage loss.
How It Works
A diode is placed in series with the backlight. It allows current to flow only in the correct direction, blocking any reverse flow that could harm the circuit.
- Voltage Drop: 0.7V for standard diodes, or 0.3V for Schottky diodes.
- Reverse Leakage: Typically less than 1 µA.
- Limitations: The voltage drop reduces efficiency, making it less ideal for low-voltage systems.
MOSFET-Based Ideal Diode
This setup is efficient and scalable, perfect for power-sensitive designs.
How It Works
A P-channel or N-channel MOSFET acts as a switch. It stays on for correct polarity and turns off under reverse polarity, preventing damage with minimal loss.
- Rdson: Less than 50 mΩ, keeping voltage drop low.
- Gate Threshold: Must match the backlight voltage, like 2-4V.
- Advantages: Much lower power loss than diodes and works well with higher currents.
Smart-Diode ICs
These chips are advanced, adding convenience and safety features.
How It Works
Smart-diode ICs detect the polarity. They either block reverse current or correct it using internal switches, offering an automated solution.
- Quiescent Current: Less than 1 µA, with some designs at zero IQ.
- Response Time: Ranges from microseconds to milliseconds.
- Advantages: Automatic correction plus extras like overcurrent protection.
Identifying the Mechanism
These steps help you quickly spot the mechanism in your system.
To figure out which protection is used:
- Datasheet Review: Check for phrases like reverse polarity protection, diode, MOSFET, or smart IC.
- PCB Inspection: Look for diodes (e.g., SMD packages like SOD-123) or ICs near the backlight connectors.
- Behavioral Clue: Test with reverse polarity—no light means a diode or MOSFET; light suggests a smart IC.
How Can Advanced Techniques Confirm Reverse Polarity Protection in Backlight Systems?

Advanced techniques to confirm reverse polarity protection in backlight systems include electrical analysis with precise tools, simulating real-world conditions, and batch testing for quality assurance. These methods provide deeper insights into how reversed polarity protection performs under various scenarios for an LCD backlight.
From my hands-on work, using sophisticated tools like oscilloscopes can reveal tiny details about polarity protection response times that basic tests miss. Also, mimicking real-world stress helps ensure the LED backlight LCD holds up in tough conditions.
Here’s a breakdown of advanced methods for testing reverse polarity protection circuit:
- Electrical Analysis: Use an oscilloscope and precision multimeter to track voltage and current changes during a reverse polarity switch. Expect diodes to block instantly, under 1 µs response time, MOSFETs to show a gate delay of 10-100 µs typically, and smart ICs to lag in the millisecond range.
- Real-World Simulation: Set up transient pulses using a signal generator based on standards like ISO 7637-2 for testing. This checks how the LCD system handles voltage spikes beyond simple dc reverse polarity, ensuring durability.
- Batch Testing for QA: Automate tests with a reverse polarity relay switcher and log data via a DAQ system for multiple units. Define pass/fail by checking reverse current stays below 1 mA threshold and confirming functionality after each polarity reversed cycle.
- Data Precision: During analysis, monitor transient spikes where voltage might hit above 1.5x nominal rating briefly. This confirms if the reverse polarity protection diode or MOSFET can handle sudden shifts without failure.
What Tools Are Best for Analyzing Reverse Polarity Protection Response Times?
The best tools for analyzing reverse polarity protection response times are oscilloscopes and precision multimeters tailored for tracking transients in polarity in electronics.
Choosing the right tools is key when diving into detailed checks for reversed polarity meaning. These instruments help spot exact timings and behaviors in a reverse polarity protection circuit that standard gear can’t catch.
- Oscilloscope Use: Pick a scope with bandwidth over 100 MHz for accuracy to capture fast responses like diode blocks under 1 µs typically. It shows voltage shifts clearly during a dc polarity change, helping pinpoint protection type.
- Multimeter Precision: Use a high-resolution multimeter to measure tiny currents, expecting readings below 1 mA in reverse for protected setups. This confirms if leakage aligns with expected reverse polarity definition for diodes or MOSFETs.
- User Concern: If you’re worried about missing quick transients in an LCD system, set the oscilloscope trigger to catch events under 10 µs duration. This ensures no critical reversed polarity response slips through unnoticed.
How Can You Design Custom Reverse Polarity Protection for Backlight Systems?

Designing custom reverse polarity protection for backlight systems involves selecting the right components, creating an effective circuit layout, and considering efficiency impacts. This ensures your LCD backlight stays safe from reversed polarity issues.
I’ve found that tailoring a protection setup for polarity in electronics can greatly improve reliability, especially for unique setups. Picking components and designing circuits with care helps avoid damage from dc reverse polarity while keeping performance high.
Here’s a clear guide to building a custom reverse polarity protection circuit:
- Component Selection: Choose a Schottky diode with a low voltage drop of 0.3V at 1A rating for minimal loss. For MOSFETs, go for a P-channel with resistance under 50 mΩ and Vgs matching the backlight voltage like 3.3V or 5V.
- Smart IC Option: Opt for a zero-IQ smart IC with fault detection, rated for 5V and 500 mA capacity, to handle reversed polarity automatically. This adds extra safety features for the LED backlight LCD.
- Circuit Schematic: Place a series diode or MOSFET between the power input and backlight to block dc polarity errors. If using a smart IC, add a bypass capacitor rated for 0.1 µF typically to stabilize operation.
- PCB Layout Tips: Keep trace resistance low by using wider paths, targeting under 10 mΩ per inch. Include test points for probes to measure voltage and current during reverse polarity protection checks.
What Efficiency Trade-Offs Should You Consider in Custom Reverse Polarity Protection?
When designing custom reverse polarity protection, consider efficiency trade-offs like power loss in diodes, MOSFETs, and smart ICs for your LCD system.
Efficiency matters a lot when protecting against reversed polarity meaning, as losses can impact overall power use. Balancing protection and minimal energy waste is key for a practical reverse polarity protection diode or circuit design.
- Diode Losses: Calculate power loss as voltage drop times current, such as 0.3V x 50 mA equals 15 mW. This can drain power in low-voltage backlight polarity setups, so choose wisely.
- MOSFET Losses: Measure loss with current squared times resistance, like 0.05Ω x (50 mA)² equals 0.125 mW. This is often lower than diodes, making it better for polarity protection in efficient designs.
- Smart IC Impact: Check the datasheet for quiescent current and switching losses, often under 1 µA for zero-IQ types. This helps gauge if the IC fits your reverse polarity protection circuit without wasting energy.
- User Concern: If you’re worried about heat from losses in an LCD system, monitor component temps during tests, aiming for under 40°C rise above ambient. Adjust design if losses exceed 20 mW continuously to avoid issues.
Addressing User Challenges in Testing LCD Backlight
Testing LCD backlights, particularly for reverse polarity protection, can present several challenges. Below, we outline solutions and strategies to address these common issues effectively.
Difficulty Identifying Protection Type
When documentation is unavailable or unclear, identifying the type of reverse polarity protection can be difficult. To resolve this:
- Solution: Observe the backlight’s behavior under reverse polarity. If there’s no light, it likely uses a passive protection mechanism like a diode or MOSFET. If light appears, it might indicate a smart IC controlling the circuit.
- Workaround: If uncertainty persists, contact the manufacturer for clarification or assume passive protection (e.g., a diode) to proceed safely. This minimizes the risk of damaging the backlight during testing.
Safe Testing Procedures
Applying reverse polarity without knowing the protection status poses a risk of burning out the LEDs. To mitigate this:
- Risk: Unprotected LEDs can fail under reverse polarity.
- Mitigation:
- Use a power supply with the current limited to 10% of the backlight’s nominal operating current.
- Limit test duration to 5-10 seconds to prevent overheating or damage.
- Begin with a low voltage (e.g., 1V) and gradually increase only if the backlight shows no signs of distress.
These precautions ensure the backlight remains functional while you assess its protection.
Interpreting Ambiguous Results
Reverse polarity tests can sometimes yield confusing outcomes, such as small leakage currents or dim lighting. Here’s how to interpret them:
These steps help you distinguish between benign quirks and actual issues, ensuring accurate diagnosis.
- Concern: Unexpected behavior like leakage current or dim light.
- Resolution:
- A leakage current below 10 µA is typical for diodes or MOSFETs and indicates normal operation.
- Dim light could suggest a bypass in the circuit or a failure. To confirm, switch to correct polarity and test the backlight’s functionality. If it operates normally, no permanent damage has occurred; otherwise, replacement may be necessary.
Related Articles:
Embedded Development Basic Tutorial: Detailed Explanation of the 16×2 LCD Module
How to Make Embedded LCD Brighter?
How Should You Drive Backlight in an Embedded LCD Display?
How Are Embedded LCDs Used in Human-Machine Interfaces (HMIs) for Industrial Control Systems?
What Is Embedded DisplayPort (eDP) and Why Is It Used in Modern Devices?
FAQ
Can Reverse Polarity Damage My LCD Backlight Permanently?
Yes, reverse polarity can damage your LCD backlight permanently if no protection is in place. Always test with a current-limited supply to minimize risk during dc reverse polarity checks.
How Do I Know If My LCD System Has Built-In Reverse Polarity Protection?
Check the datasheet for mentions of a reverse polarity protection circuit or look for diodes near power inputs on the PCB. If unsure, perform a safe reversed polarity test to observe behavior.
What Happens If I Accidentally Connect Power in Reverse Polarity for Too Long?
Connecting power in dc reverse polarity for too long without polarity protection can overheat and burn out the backlight. Limit test duration to 5-10 seconds and stop if you notice unusual behavior.
Should I Upgrade My Reverse Polarity Protection for Older LCD Systems?
Upgrading reverse polarity protection for older LCD systems can prevent damage if current protection is weak. Add a reverse polarity protection diode or MOSFET if the original design lacks robust safeguards.
How Often Should I Test Reverse Polarity Protection in My LCD Backlight?
Test reverse polarity protection during initial setup or after repairs to ensure the LED backlight LCD remains safe. Repeat only if you suspect damage or modify the reverse polarity protection circuit.