Quick Answer: How to Check if Your Monochrome LCD Module is Working?
To quickly check if your monochrome LCD module is working, just follow these simple steps:
- Check the Power Supply: Make sure your LCD is getting the right voltage. It should be either 5V or 3.3V, depending on your model. Use a multimeter to test the voltage at the VCC and GND pins.
- Verify Connections: Check all of your wires. Make sure everything is secure and connected correctly. Pay extra attention to the data lines like RS, RW, and E pins.
- Adjust the Contrast: Use the contrast potentiometer to make the display brighter or dimmer. If it is too dark, this can help you see better.
- Test with Simple Code: If you are using a device like Arduino, upload a simple program like “Hello, World!” This will show you if the LCD is working well.
- Check the Backlight: If you see text on the screen but it is hard to read, make sure the backlight is on and working.
Step-by-Step Troubleshooting for Monochrome LCD Modules
1. Check the Power Supply
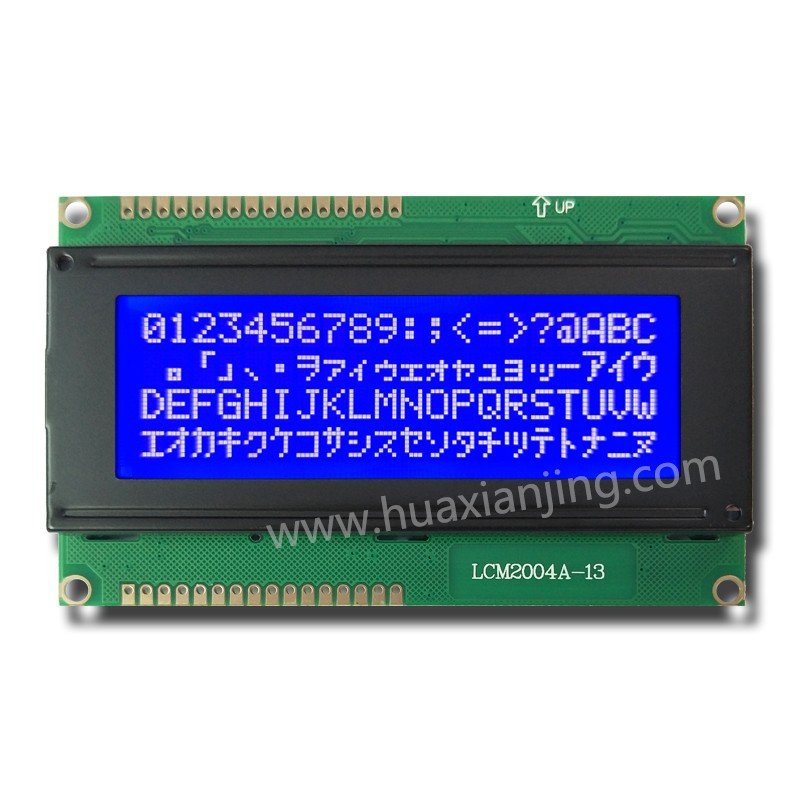
The main reason a monochrome LCD might not work is often because of power problems. Many modules, like the 1602 or 2004, require a 5V DC power supply. Some lower-power models can function with only 3.3V. It is crucial to use the correct voltage for your specific monochrome LCD module.
- Tip: Check the voltage at the VCC and GND pins using a multimeter.
- If you are using a 1602 module, the reading should be around 5V.
2. Verify the Wiring and Pin Connections

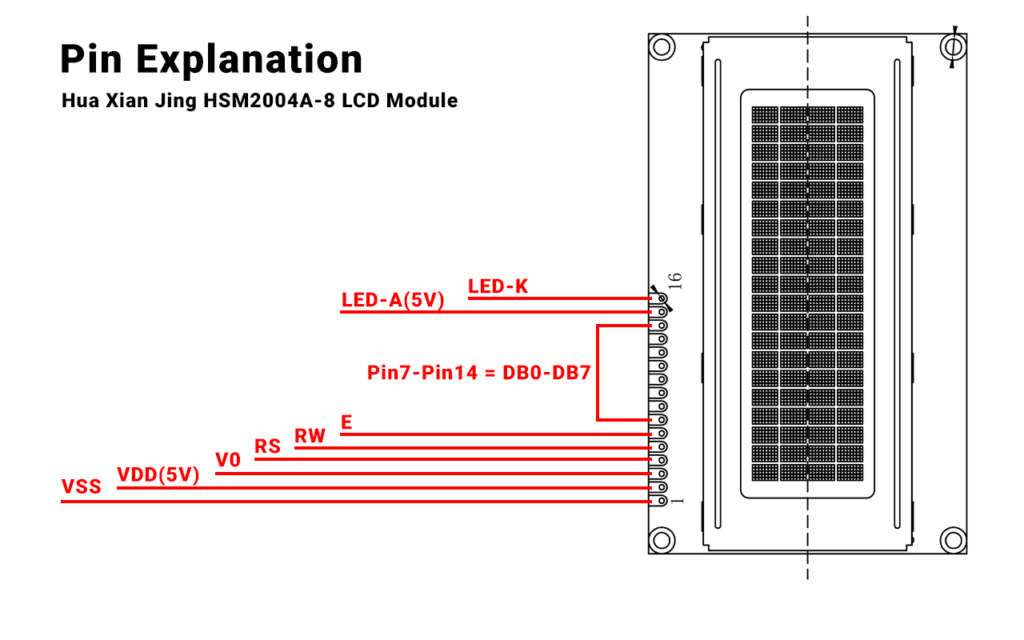
After you check the power supply, the next problem usually comes from bad wiring. Loose or incorrect connections, especially on the data pins (RS, RW, E for the 1602), can cause the LCD to stop working properly. It is vital to confirm that all connections are correct according to the datasheet for your specific model.
- Tip: For 2004A-8 modules, keep these points in mind:
- Connect VCC (Pin 2) to 5V .
- Connect VSS(Pin 1) to ground.
- Use a potentiometer to change the contrast (Pin 15) for clearer text.
- A good idea is to use jumper wires and a breadboard. This helps create strong and stable connections.
- You can unplug and reconnect the wires to make sure nothing is loose.
3. Adjust the Contrast
If your LCD screen seems dim or blank, the issue might be with the contrast setting. Monochrome TFT LCD modules, like the 1602 and 2004, usually come with a contrast knob. This knob uses RGB technology. You can turn it to see the display more clearly.
- Tip: If you find it hard to read text, adjust the potentiometer until the display gets clearer. If the screen looks too dark or seems black, try making the contrast lower.
I have seen that changing the contrast helps many people. This is especially true in factories. The light in these places can change a lot.
4. Test with Code or Multimeter
Once you have checked the power, connections, and contrast, you should see if the LCD is working well with the microcontroller or control circuit.
- Upload a Test Program: If you have an Arduino board, upload a simple “Hello, World!” program. This will help you check if the LCD is working and connected right.
- Multimeter Check: If you use I2C communication, use a multimeter to test the SDA and SCL lines. Look for voltage changes when the display should change. If there are no changes, the LCD module might have a problem.
My Experience: When I started working with LCDs, I used a basic test code. This allowed me to see if everything was working correctly. It is often the simplest way to identify a problem without checking each connection and fixing it.
5. Check the Backlight
If your LCD works but is hard to read, the LED backlight (How does the LCD backlight work?)might be the issue. Many monochrome LCD modules have special pins for the backlight. If these pins get the wrong voltage, usually 5V or 3.3V, the screen can be difficult to see in low light. You might want to consider upgrading it for better low power consumption. A simple 4-wire SPI interface could also be a good choice.
- Tip: Make sure the backlight pin is receiving power. If text appears on the screen but the backlight doesn’t light up, then your LCD is likely fine. You may need to repair or replace the backlight.
Common LCD Module Issues and How to Fix Them
I still saw some common problems after following these steps. Here are the issues I found and how to fix them:
- Screen Flickering: This often occurs because of unstable power or weak connections. Ensure the power supply is stable. Also, check that all wires are tightly connected.
- Partial or Messy Display: This usually happens because of wrong contrast settings or broken wiring on data pins like RS, RW, or E. Recheck the wiring to make sure everything is secure.
- No Display (Blank Screen): A blank screen often results from simple issues. This could be a misconnected power supply, wrong contrast setting, or loose wiring. Look over these areas again carefully.
When to Replace or Seek Professional Help
If your LCD module still isn’t working after your attempts to fix it, you may need to get help from a professional. You might even think about getting a new one. Most LCD modules last a long time. Still, some older or lower quality ones can have issues quickly or may wear out over time. If you need assistance, feel free to email us.
- My Insight: I have 12 years of experience. I know that not all LCDs are the same. A new module can solve problems quickly. This matters in factories. A lot of downtime can lead to losing money.
Conclusion: Troubleshooting Your Monochrome LCD Module
Diagnosing problems with your monochrome LCD display module is easy. Just follow these steps. First, check the power supply. Next, examine the wiring closely. Then, adjust the contrast. Lastly, test it with a microcontroller. By doing these steps, you can quickly find and fix most issues.
In my experience, it’s important to really look at each part. Check the power, the connections, and the settings. Be patient when you read part change notices. These modules usually work well. After you look at the common problems, you can often find the solution quickly.
Quick Troubleshooting Checklist
- Test Power: Check if the voltage is correct. It should be either 5V or 3.3V.
- Check Connections: Make sure all the wires are connected properly and tightly.
- Adjust Contrast: Turn the potentiometer to find the best contrast.
- Upload Simple Code: Run a simple “Hello, World!” code to see if it can communicate.
- Verify Backlight: Check the backlight voltage if the screen is difficult to read.
By doing these steps, you can solve problems quickly. This helps when starting new projects and also keeps old tools working well.


