Struggling with uneven, blotchy backlights in your products? It’s a common problem that can ruin an otherwise great design. Achieving perfectly uniform side-lit LED lighting is the solution.
In my experience, achieving uniform side-lit backlighting comes down to three key areas: selecting the right LEDs, engineering a high-quality Light Guide Plate (LGP), and using the proper optical films like diffusers.
I remember one project where we had terrible “hot spots” near the edges of a display. It was a nightmare for the client. This experience taught me that solving this isn’t just about parts; it’s about a total design strategy.
What Are Side-Lit LED Backlights and Why Is Uniformity Critical?
Opening a device to see a smooth, even glow is satisfying. That’s often the work of a side-lit, or edge-lit, backlight system. But getting it right is crucial.
A side-lit backlight has LEDs placed along the edge of a panel, shining light horizontally into a Light Guide Plate (LGP). Uniformity is critical because it ensures a consistent, high-quality visual experience without distracting bright or dark spots.
Understanding Side-Lit LED Configuration
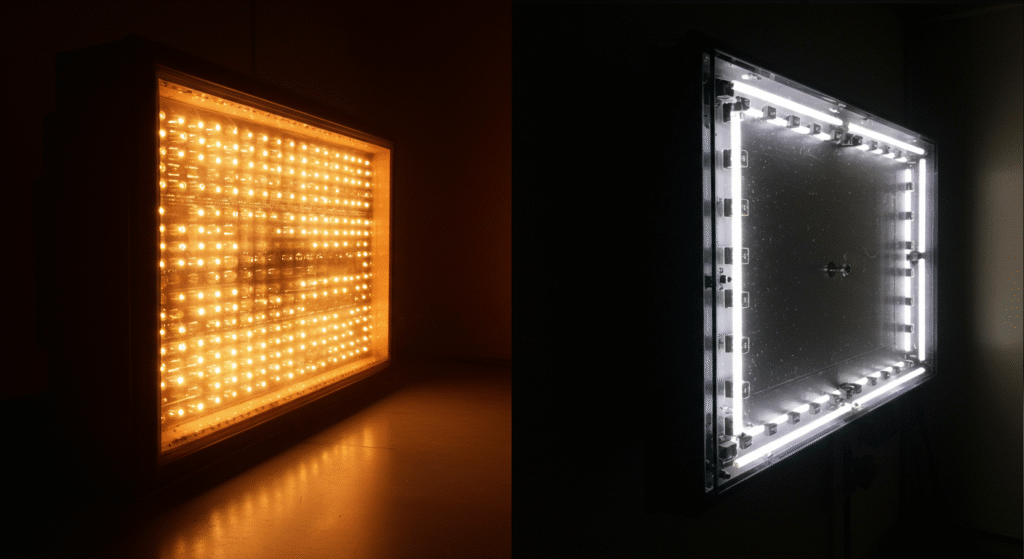
In a typical setup, a strip of LEDs is mounted to the side of a clear panel, which we call the Light Guide Plate or LGP. These LEDs don’t shine toward you; they shine sideways into the material. The LGP’s job is to take that light from the edge and redirect it evenly out of the front surface, illuminating your display or graphic. This design is what allows for incredibly thin products(LED Backlight Technology Analysis: CCFL, WLED, DLED, ELED, and FALED).
The Uniformity Challenge in Side-Lit Systems
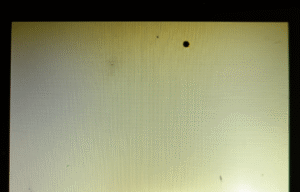
The main challenge is simple physics. The areas of the LGP closer to the LEDs naturally get more light, so they appear brighter. The light gets dimmer as it travels further from the source. This can create an uneven look with “hot spots” near the LEDs and dark patches far away. Over time, low-quality materials can also turn yellow, which further ruins the light distribution. My job is to fight this tendency and trick the light into spreading out perfectly(Why Does LCD Yellowing Occur Over Time?).
What Technical Factors Affect LED Backlight Uniformity?
To get that perfect glow, you have to control several technical factors. It’s not one single thing but how different components work together that makes the difference.
The final uniformity of a side-lit system depends mainly on three things: the characteristics of the LEDs, the design of the Light Guide Plate, and the quality of the optical films used.
LED Characteristics and Selection Criteria
It all starts with the light source. I always look for LEDs that have a wide emission angle. This helps the light spread out as much as possible as soon as it enters the LGP. The quality of the LED chip itself also matters a lot, as it impacts the brightness and color consistency from one LED to the next. Even the number of LEDs you use is a balancing act. More LEDs can make it easier to get uniform light, but it also increases cost and power consumption.
Light Guide Plate Design Principles
The Light Guide Plate is the heart of the system. A good LGP is designed with a specific pattern of microscopic dots or lines etched or printed onto its surface. These patterns are not random. They are engineered to be denser or larger the farther they are from the LEDs. This coaxes more light out of the plate in those dimmer areas, creating an even appearance across the entire surface. The mechanical design is also key; you need enough physical space for the light to spread out before it reaches the visible area.
Diffusion Materials and Optical Components
Even with a great LGP, you’ll still have some imperfections. That’s where optical films come in.
- Diffuser Film: This is a sheet placed on top of the LGP. Its job is to smooth out the light, blur any remaining hotspots, and give the surface a soft, uniform look.
- Reflector Film: This film goes behind the LGP. Any light that might escape out the back is bounced back into the LGP, which increases brightness and improves uniformity without needing more power.
| Component | Role in Uniformity | My Key Consideration |
|---|---|---|
| LEDs | The initial light source. | Must have a wide, consistent emission angle. |
| Light Guide Plate (LGP) | Distributes light from the edge across the surface. | The light extraction pattern must be engineered precisely. |
| Diffuser Film | Smooths out light and hides imperfections. | Must provide good diffusion without significant light loss. |
| Reflector Film | Recycles light to increase brightness and uniformity. | High reflectivity is essential for efficiency. |
How Do You Design an Effective Side-Lit LED System?
Designing a uniform backlight is a systematic process. You have to think about the LEDs, the LGP, and even heat, all at the same time.
An effective design combines smart LED placement with sophisticated light guide engineering and robust thermal management to ensure the backlight is not only uniform but also reliable over its lifetime.
LED Placement Strategies for Maximum Uniformity
Where you put the LEDs matters. If they are too close to the viewing area, you’ll get bright spots no matter what you do. One technique I use is to incorporate tiny lenses, or lens arrays, directly onto the edge of the LGP where the light enters. These lenses help to pre-spread the light, giving it a better head start. This can sometimes allow us to use fewer LEDs, which saves cost and power.
Light Guide Engineering Techniques
This is where we get really technical. The patterns on the LGP—whether they are tiny etched dots, V-shaped grooves, or printed textures—are our main tool for controlling uniformity. Using optical modeling software, my team can simulate how light travels through the LGP. We adjust the size, density, and shape of these patterns to pull out just the right amount of light at every point on the surface. It’s a detailed process that turns a simple piece of plastic into a highly advanced optical component.
Thermal Management in Side-Lit Configurations
LEDs create heat, and heat is the enemy of performance. As an LED gets hotter, its brightness drops and its color can shift. In a side-lit design, we often mount the LED circuit board directly to a metal (usually aluminum) frame. This frame acts as a heat sink, pulling heat away from the LEDs and dissipating it into the air. This keeps the LEDs running cool, which ensures their brightness remains stable and uniform for years.
How Do Side-Lit LEDs Compare to Other Backlight Technologies?
Side-lit technology is popular for a reason, but it’s not the only choice. Understanding how it compares to other options helps you choose the right solution for your project.
Side-lit (or edge-lit) systems are prized for enabling ultra-thin and efficient designs. In contrast, direct-lit systems place LEDs behind the panel, offering higher brightness and potentially better uniformity at the cost of thickness.
LED vs. EL Backlight Comparison
Before LEDs were common, many devices used Electroluminescent (EL) panels. They produce a very uniform, soft glow, but they have some major drawbacks compared to modern LEDs.
| Feature | Side-Lit LED | EL Panel |
|---|---|---|
| Thickness | Very thin designs are possible. | Very thin, flexible. |
| Brightness | High brightness is achievable. | Lower brightness. |
| Lifespan | Long lifespan (30,000+ hours). | Shorter lifespan, dims over time. |
| Power Consumption | Very energy efficient. | Requires an inverter, less efficient. |
| Color | Full range of colors available (RGB). | Limited color options. |
Edge-Lit vs. Direct-Lit LED Configurations
This is the most common comparison I discuss with clients. Both use LEDs, but the arrangement is completely different.
In an edge-lit system, the LEDs are on the sides pointing inward. In a direct-lit system, an array of LEDs is spread out directly behind the entire display, shining straight at you. Each has clear pros and cons.
| Feature | Edge-Lit (Side-Lit) | Direct-Lit (Back-Lit) |
|---|---|---|
| Thickness | Very thin and lightweight. | Thicker and heavier. |
| Uniformity | Good, but requires careful engineering. | Generally offers better uniformity. |
| Brightness | Good brightness. | Can achieve higher brightness levels. |
| Cost | More cost-effective, uses fewer LEDs. | Can be more expensive due to the higher number of LEDs. |
| Best For | Laptops, monitors, thin signage, applications where profile is key. | TVs, applications where high brightness and perfect uniformity are top priorities. |
What Are the Best Practices for Optimizing Side-Lit LED Uniformity?
Getting consistent results project after project comes down to following a set of best practices that I’ve refined over my 13 years in the industry.
To optimize uniformity, I stick to proven design guidelines, insist on high-quality optical components, and oversee the assembly process carefully to prevent any issues that could compromise the final result.
Design Guidelines and Standards
Good design starts with a solid foundation. My first rule is to ensure good mechanical design. This means leaving enough room between the LEDs and the visible area of the backlight to allow the light to spread out naturally. Another critical rule is to keep anything non-optical, like mounting screws or adhesive tapes, out of the light path. These things can block or absorb light, creating shadows that are impossible to fix later.
Installation and Assembly Considerations
Even the best design can be ruined by poor assembly. When the backlight is installed, it’s vital that no pressure is put on the LGP, as mechanical stress can create bright or dark blotches. All electrical connections must be secure; a loose wire can cause flickering or complete failure. During assembly, we also have to be extremely careful to keep the optical films (the diffuser and reflector) perfectly clean and aligned. A single fingerprint or piece of dust can show up as a dark spot on the final product.
What Are the Best Practices for Optimizing Side-Lit LED Uniformity?
You can’t just eyeball uniformity and say “it looks good.” In manufacturing, we need objective, repeatable data to prove that a backlight meets the client’s specifications.
We measure uniformity by dividing the backlight surface into a grid and using a lux meter to record the brightness at each point. Then, we calculate the uniformity ratio using the formula U0 = Minimum Brightness / Average Brightness.
Measurement Techniques and Equipment
The standard tool for this job is a lux meter, which measures illuminance in units of lux. The process is straightforward:
- Define a grid of points on the surface of the backlight. A 9-point or 13-point grid is common.
- Place the lux meter’s sensor at each point and record the brightness reading.
- For more complex analysis, specialized software like DIALux can simulate and analyze uniformity before a physical prototype is even built.
Performance Specifications and Tolerances
Once we have the measurements, we calculate the uniformity. There are two main formulas we use:
- General Uniformity (U0) = E(min) / E(avg): This compares the dimmest spot to the average brightness. It’s the most common spec for general display applications.
- Overall Uniformity (U1) = E(min) / E(max): This compares the dimmest spot to the brightest spot. It’s useful for identifying high-contrast areas that could be distracting.
The target value is always as close to 1.0 as possible, which would represent perfect uniformity. For a high-quality display, a client might specify a uniformity of 80% (0.8) or higher.
What Are the Applications and Use Cases for Uniform Side-Lit LEDs?

Because they enable thin designs with beautiful, even light, side-lit LEDs are incredibly versatile. I’ve seen them used in everything from medical devices to architectural lighting.
The most common applications are slim displays and monitors, architectural lighting where the light source must be hidden, and industrial panels where performance and a compact form factor are essential.
Display and Monitor Applications
This is the classic use case. Nearly every laptop, tablet, and thin desktop monitor uses a side-lit LED backlight. The technology allows these devices to be incredibly thin and light while still providing a bright, uniform image that’s easy on the eyes.
Industrial and Technical Applications
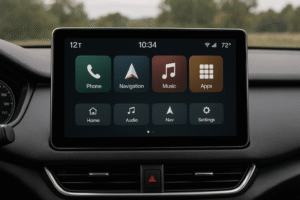
In the industrial world, side-lit backlights are often used in machine vision systems. They create a perfect silhouette of a part, allowing a camera to easily inspect its dimensions or check for defects. They are also used for control panels on machinery, in-vehicle displays, and medical instruments where clarity and reliability are non-negotiable.
What Are the Key Challenges in Side-Lit LED Implementation?
While side-lit technology offers many advantages, it’s not without its challenges. Getting it right requires navigating a few key trade-offs during the design and manufacturing phases.
The single biggest challenge in implementing side-lit LEDs is balancing performance with cost. Achieving very high uniformity requires premium materials and precise manufacturing, which directly impacts the final price of the product.
Cost vs. Performance Trade-offs
This is a conversation I have with nearly every client. Everyone wants perfect uniformity, but not everyone has the budget for it.
- Materials: Using a high-grade PMMA acrylic for the LGP gives the best performance, but a cheaper Polystyrene (PS) material can save money. The trade-off is that PS can yellow over time and has lower light transmission, which hurts long-term uniformity.
- Manufacturing: Creating a highly complex, computer-optimized pattern on the LGP is more expensive than using a simple, generic pattern. The generic pattern is cheaper but will never achieve the same level of uniformity.
- Number of LEDs: Using fewer LEDs reduces cost, but it makes achieving uniformity much harder and often requires more advanced optics, like lens arrays, to compensate.
Ultimately, my role is to help the client find the right balance for their specific application and budget.
Conclusion
Achieving uniform side-lit backlighting is a detailed engineering task. It relies on the careful selection of LEDs, precise LGP design, and the right optical films working together as a system.
Related Articles:
Why Does My LED-Backlit LCD Screen Flicker?
What Are the Differences Between Single-Touch and Multi-Touch LCD Screens?
How Do Page Addressing Mode and Horizontal Addressing Mode Differ in Embedded LCD Systems?
How Are Real-Time Process Parameters Visualized on Industrial LCD Panels?
How Do TN, IPS, and VA LCD Panels Affect Backlighting System Design?
FAQ
What causes yellowing or color shifts in side-lit LED backlights over time?
Yellowing or color shifts usually come from LED aging or poor-quality optical materials. Choosing high-quality LEDs and stable optical films helps avoid this issue.
Why do side-lit LED backlights fail more often than other backlight types?
Side-lit systems are inherently more prone to failure due to concentrated heat generation along the edges. This concentrated heat causes warped reflector sheets, cracked light guide plates, and burnt-out LEDs, while direct-lit systems distribute heat more evenly across the entire panel.
How long do side-lit LED backlights typically last before failing?
Side-lit LED backlights typically last 30,000+ hours under normal conditions, but their lifespan depends heavily on heat management and usage patterns.
Are side-lit LED backlights suitable for outdoor use?
Yes, but you must select UV-resistant materials and waterproof designs. Outdoor models should also handle higher heat and more direct sunlight exposure.
What should I do if I see dark spots after assembling the backlight?
Dark spots may be due to misaligned LEDs or damaged optical films. Re-check the assembly, ensure all parts are clean, and confirm that LEDs are evenly placed.